Scripting allows you to automate common tasks very easily, even if you’re not an experienced developer. One of the best resources for scripters in the Windows world is definitely MSDN Technet’s Script Center. If you’re looking for common scripts, chances are you’ll find one there, or one that you can quickly modify to suit your needs. There’s a large selection of scripts that have to do with Virtual Server – from automatically installing Virtual Machine additions, to modifying the properties of a Virtual Machine. You can check out the complete list here: Virtual Machine and Virtual Server Properties
If you need to connect to a Virtual Server 2005 installation to execute remote scripts, because of security, you can do one of two things. The first one is to use the “ConnectServer” method in your scripts, in order to provide the necessary credentials to connect to the server. To do this, you should have these lines on your script:
Set objWbemLocator = CreateObject("WbemScripting.SWbemLocator")
Set objWMIService = objwbemLocator.ConnectServer(<Computer>, "\\root\vm\virtualserver", <user>, <password>)
Then you can use the normal methods to query the information from Virtual Server
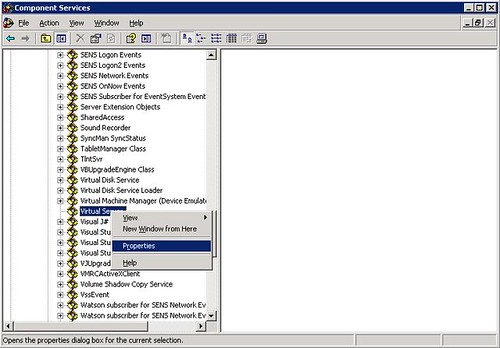
The second one is to configure the Virtual Server DCOM object so that it allows a remote connection. This has obvious security risks, but can be configured so that only certain groups have the necessary priviledges to execute the code. To do this, you first need to open the Component Services console, and navigate to the node Console Root->Component Services->Computer->My Computer->DCOM Config. There, you need to locate the Virtual Server node, and select properties from the context menu:
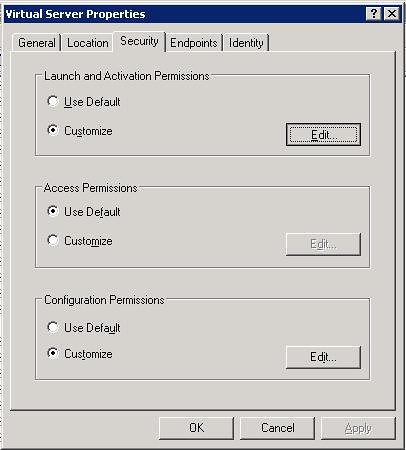
On the properties page, go to the Security tab, and you need to customize the permission on the Launch and Activation Permissions box by clicking Edit…:
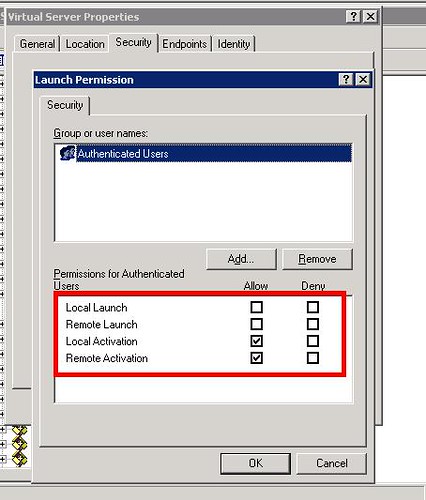
On that page, you can add groups or users that will be able to launch or activate Virtual Server’s COM objects, as well as fine-tune what each user will be able to do:
This second approach works better with servers that are in an Active Directory domain. On a stand-alone machine, the remote host may have issues providing the credentials to obtain the remote activation and launch permissions required.
WMI (Windows Management Instrumentation) provides a mechanism to manage systems and applications in an enterprise environment. WMI is actually Microsoft’s implementation of Web Based Enterprise Management (WBEM), a unified mechanism used for managing networks.
With the release of Virtual Server 2005, Microsoft included new classes in WMI in order to manage and monitor VS2005 installations. These classes are represented through a namespace, in this case //root/vm/virtualserver. So, if you are new to WMI and Virtual Server, what can you do with this information?
Let’s start off by introducing you to two tools that can get you started.
The first one is WMI Explorer, a free tool from KS-Soft, that can show you the available classes and methods in a WMI namespace. When you first start up the application, you’ll see a class explorer that shows you all the classes available in the default namespace, root\cimv2 (CIM stands for Common Information Model, the data model of the WBEM standard). To connect to a different namespace, you need to select Action->Connect to Remote Host… , and then enter Virtual Server’s namespace:
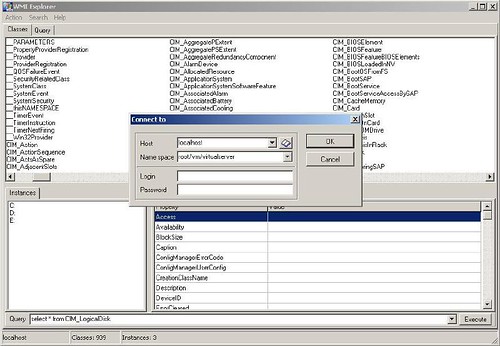
You can also enter the address of a remote host to connect to a remote instace of Virtual Server. Keep in mind that you need to enter a user with enough privileges.
Once you press enter, you’ll be presented with Virtual Server’s classes. Of particular interest are the last four: VirtualMachine, VirtualNetwork, VirtualServerProvider and VmWmiObject:
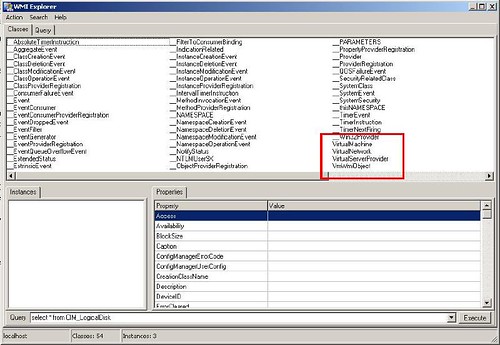
With these four classes you can access virtually all information about a Virtual Server installation. Double clicking on them in WMI Explorer will show you all of its properties and the current state.
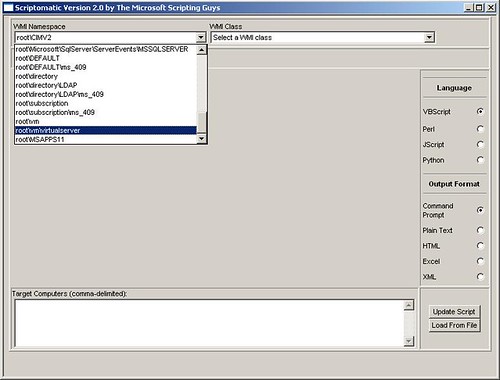
With this information, what things can you do? Well, that’s where the second tool comes into play. It is called Scriptomatic 2.0, a WMI utility you can download from Microsoft’s website that helps you write WMI scripts. When you open this tool, you first need to select the correct WMI namespace:
And after that, you can select any of the WMI classes declared within that namespace, and that will write a basic script for you that queries the class:
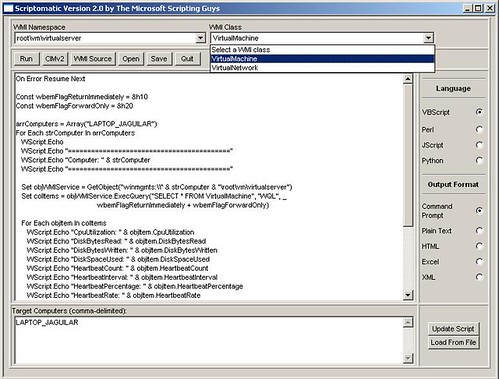
Based on it, you can start querying the VMs, the Virtual Networks, the status of the server, etc… and you can even run the scripts from within Scriptomatic. From this point on, you can start exploring the information you can query, and write your own WMI scripts!
Last I week I posted about the Itanium 2 9000 Series being launched with hardware virtualization support (what was formerly known as Silvervale). I also mentioned that neither Windows 2003, Virtual Server, nor Longhorn will support virtualization on this platform. That much is true from Microsoft’s perspective, but HP is indeed planning to support Windows 2003 Server through its Virtual Server Environment.
The Virtual Server Environment has been available for a while, and also has an enterprise-class management tool in the HP Integrity Essentials Virtualization Manager. This is currently available for HP-UX, but will also be available for Linux and Windows in the near future. The Virtualization Manager has some interesting features, and is also integrated with HP’s Serviceguard product. From last month’s press release:
... For example, customers can use the capability to automatically allocate additional server capacity to financial applications during the month-end close.
For customers that are concerned about the availability of their mission-critical UNIX® environments when they consolidate using virtualization, HP has further integrated HP Serviceguard for HP-UX 11i with HP Integrity Virtual Machines. Available now with the latest release of HP Serviceguard, this functionality helps guard against failure by automatically moving the virtual machines between servers in a VSE. HP Integrity Virtual Machines also now enables easy manual migration of virtual machines, accelerating application qualification and deployment....
Keep in mind that HP also offer Node Partitions (nPars) and Virtual Partitions (vPars) options on the high-end Integrity and 9000 lines of servers, with Instant Capacity on Demand (iCOD) capabilities. Depending on your requirements, these may be even better options than virtual machines pure virtual machines.
This is a post from several months ago that I made on the 64–bit Advantage blog. Since now we’re working with virtualization (at the time it was only an interest of mine), I think it is worth it to re-post it here:
I wanted to make a brief mention of the Virtualization Technology that is being introduced in the latest generation of Intel CPUs (known as VT-x). This technology was formerly known as "Vanderpool", and it is already available on some Pentium 4, Pentium D, Xeon and Core Duo CPUs. Later this year it will also be available on the next generation Itanium CPUs, using a technology known as "Silvervale".
I was talking with a coworker the other day about this technology, and our main question was "What is it exactly that it does? What advantage would it have over traditional software virtualization?" Well, to answer these two questions:
On a virtualization environment, there's the Virtual Machine Monitor (VMM), which handles the processor and physical resources of the machine, and the Guest Software, which operate inside a Virtual Machine handled by the VMM. VT-x introduces 10 new intructions to the architecture for facilitating the tasks of the VMM. Some of them, such as VMLAUNCH and VMRESUME, allow the VMM to start/enter running VMs, or VMON/VMOFF, turns the Virtualization functionality on and off.
The main reasons for using VT-x over software virtualization are speed and reliability. With hardware support, you are pretty much creating the equivalent of a hardware partition for the Guest Software, which improves both the performance and the robustness of the VM - and this is vital for consolidated server environments, one of the areas where VT-x is expected to be heavily used.
Now, one thing- why mention Intel's VT-x on this site? Well, one of the strenghts of 64-bit computing is that with more resources available on a single box, it is easier to to consolidate servers. With the new support for virtualization on the CPUs, you can use Virtual Machines for consolidation, so each software server has its own isolated environment without sacrificing performance.
More information here.
After several years of delays, the Dual-core Itanium 2, formerly known as Montecito, was unveiled by Intel. According to the press release:
They double the performance and lower energy requirements, improving performance per watt by 2.5 times compared to existing, single-core versions.
The Dual-Core Intel® Itanium® 2 processor 9000 series delivers performance at a system scale unmatched by competing RISC architectures. It set world record results in several key server benchmarks including a score of 4230 SPEC_int_rate_base_20001, nearly triple the previous record.
The CPU incorporates virtualization features, similar to the ones found on current-generation Intel x86 CPUs. My understanding is that neither Windows 2003 Server nor Viridian will support VT on the Itaniums, but my guess is that other vendors will, especially with the enhanced CPU horsepower and memory capability of this boxes.
Also, according to the press release, the Itanium Solutions Alliance is working on new system and applications that will leverage the power of this new CPU. We've worked with the ISA in the past, for the Developer Days events, in which we showed ISV how to port and optimize their applications for 64-bit Windows.
Link to the press release: New Dual-Core Intel® Itanium® 2 Processor Doubles Performance, Reduces Power Consumption
One of the nicest features of using Dynamic VHDs on Virtual Server 2005 is that they grow as needed, so system administrators can optimize the disk space usage between several VMs. Dynamic VHDs grow automatically, but they don’t shrink automatically. In order to shrink them, you need to run several tools both inside and outside of the virtual machine.
Recently, I installed Windows Vista Beta 2 on a virtual machine on Virtual Server. Right after the installation, this are the disk usage stats:

Inside the virtual machine, however, the total disk space usage was smaller:

In order to compact the VHD image to only use the ~9GB allocated, we need to follow this procedure:
The first step is to defragment the VHD you are going to compact. You do this from within the Virtual Machine. Once the defragmentation is completed, you need to run Virtual Server’s Precompactor. To do this, mount the image on the virtual machine from the Virtual Server console:
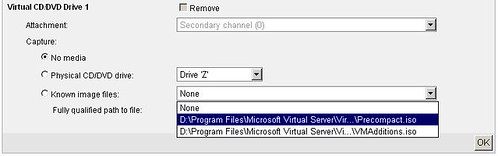
The precompactor will then execute and leave the VHD ready for compaction:


If you are running the precompactor under Vista, remember to do a “Run as administrator”. Otherwise it won’t work.
This process may (will) take a long time, so be patient.
Once it completes, you need to shut down the virtual machine, and compact the VHD from the Virtual Server web console. This can be done from the option Virtual Disks->Inspect, then select the correct VHD on the Known virtual hard disks drop-down box, and click on the Inspect button. Then select the link to Compact Virtual Hard Disk:
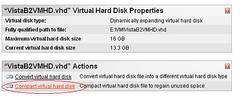
You need to click on the Compact button on the next screen, and the process will then start. This will also take a while, but once it finished, you will reclaim all the hard drive space from your VHD file! 
Yes, it is sad but true. You cannot install the Virtual Server 2005 Migration Toolkit on an x64 server:
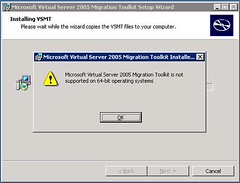
What this means is that you need to have an intermediate 32–bit Windows 2003 installation running Virtual Server in order to convert a physical server to a virtual one. Hopefully x64 server will be soported in the near future.
Here is a post that talks about this: ADS 1.1 and VSMT on 64-bit hosts
Virtual PC 2004 Service Pack 1 is now offered as a free download. From the webpage:
Whether Microsoft virtualization technology is an important component of your existing infrastructure or you're just a Virtual PC enthusiast, you can now download Virtual PC 2004 Service Pack 1 absolutely free. Microsoft is also offering the free download of Virtual PC 2007, with support for Windows Vista in 2007.
Hopefully this will further increase the adoption of virtualization technology. I can’t wait for VPC2007 for it to support for hardware virtualization, like Virtual Server 2005.
Most you I guess have heard about Sysprep, Microsoft’s System Preparation Tool. This tool removes certain information from a system, including the Security Identifier, IP address, computer name, etc. This is recommended when you are cloning a machine, and, by removing this information, you also remove any potential conflicts when starting up the cloned image for the first time.
When working with Virtual Machines, Sysprep is a real timesaver. You can, on a virtual machine, install several configurations of servers (Win2003EE/SQLServer2005, Win2003EE/IIS6.0, etc), sysprep the images, and then have these pre-configured images ready to deploy to a Virtual Server 2005 installation when needed, by just copying the appropriate VHD file over and associating it with a new VM.
In order to run Sysprep, you first need to install it. You can get a hold of Sysprep in two ways: it is on the \Support\Tools\Deploy.cab file on the Windows Server installation media, or you can download it from here. Once you get a hold of the Deploy.cab file, you should extract the contents to a directory on your HD, for example c:\Deploy.
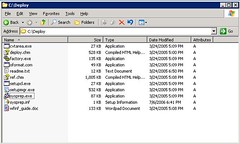
This directory contains several useful tools, and you should definitely read the deploy.chm file for instructions and details on the process. There are two files that are of particular importance to the process: sysprep.exe and setupmgr.exe.
For sysprep to work completely automated, it requires an answer file, called sysprep.inf. This answer file contains the “answers” to all the questions asked by the Windows installer during the setup process. The answer file can be created manually with any text editor, but fortunately there is a nice wizard-like tool that can help you generate this file. This tool is the setupmgr.exe program:
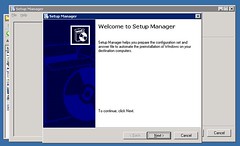
This program allows you to generate the sysprep.inf file by presenting you the options and letting you enter the default answer. In order to fully automate an installation, follow these steps on the Setup Manager:
- Click Next on the Welcome screen
- Select “Create new” and click “Next”
- Select “Sysprep setup” and click “Next”:
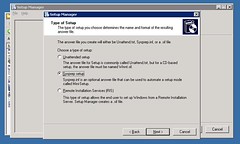
- Select the type of system you’re going to sysprep, and click “Next”
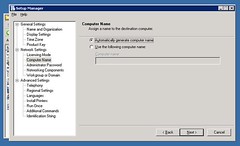
- Select “Yes, fully automate the installation” and click “Next”
- Now you need to fill in all the information required to complete the process:
Once you complete the execution of the Setup Manager, it creates a new directory in the root of the system drive called sysprep. This directory contains all the information necessary for the Sysprep tool to execute.
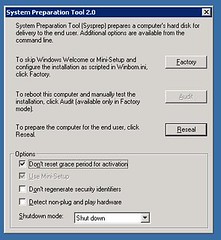
Now you need to execute the Sysprep tool, sysprep.exe:
In this tool:
- Click “OK” on the warning dialog that appears when running the tool.
- Select “Don’t reset grace period for activation”
- Set the “Shutdown mode” to “Shut down”
- Click on Reseal. That will leave the image ready for copying.
Once the image is copied, you can just configure a new virtual machine with the new image, and start it up. The last portion of the Windows setup process will execute:
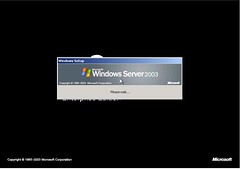
After a little while (<10min), the machine will reboot, and the process will be completed. You now have a brand new sysprep’d and cloned server up and running!!